
This looks like a standard product listing title for a COB (Chip-on-Board) LED Strip Light. If you are looking to buy, install, or understand this type of lighting, here is a breakdown of what all those specifications actually mean for your project.
Technical Specifications Decoded
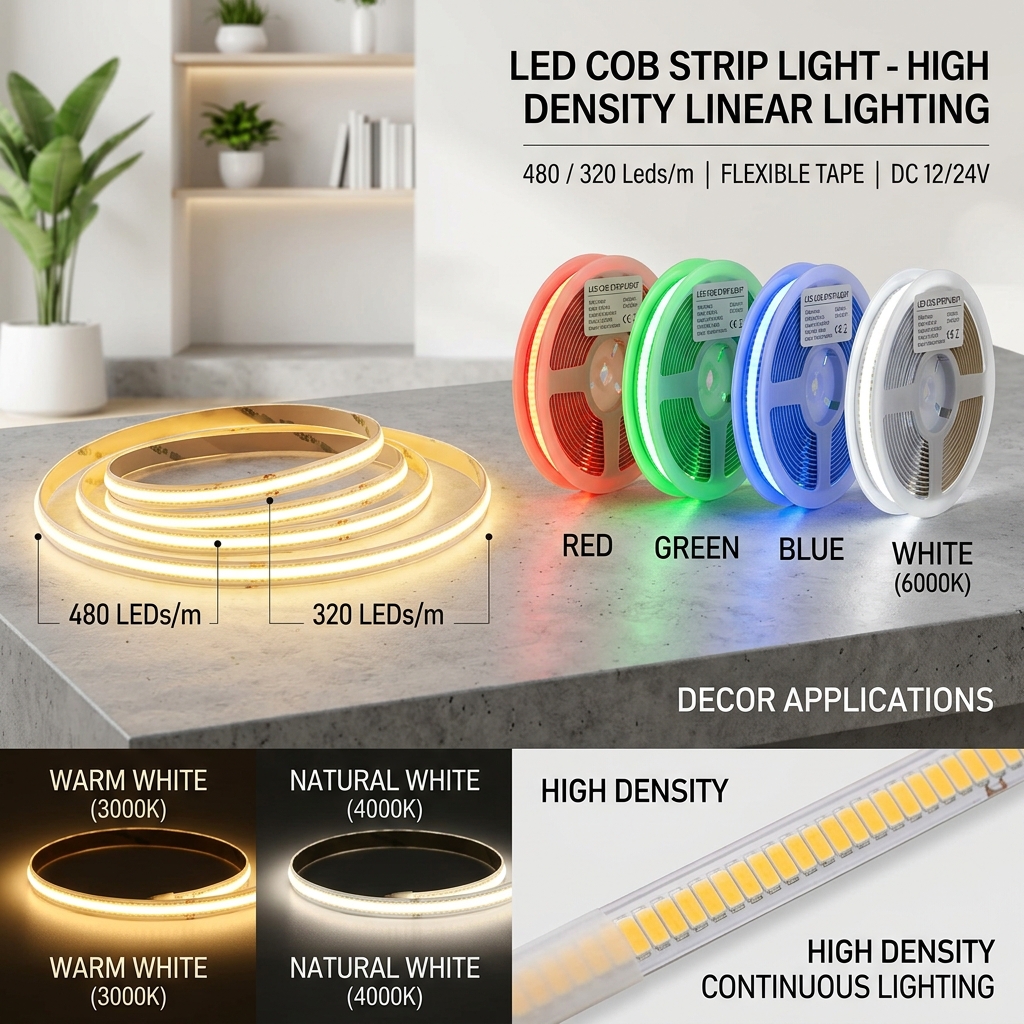
1. COB (Chip-on-Board) vs. Traditional LED Strips
Traditional LED strips (SMD) have individual LED diodes spaced out along the tape, which often creates a “dot” effect where you see bright spots.
- COB Technology: Places hundreds of tiny LED chips directly onto the flexible circuit board under a continuous phosphor coating.
- The Result: A seamless, uniform line of light with absolutely no visible spots or dots, even without a diffuser profile.
2. High Density (480 or 320 LEDs/m)
This indicates how many LED chips are packed into a single meter of the strip.
- 320 LEDs/m: Excellent for general ambient lighting, cove lighting, or backlighting.
- 480 LEDs/m: Ultra-high density. Best for direct viewing, under-cabinet lighting, or locations where the strip is very close to a reflective surface (like polished stone countertops) to ensure a perfectly smooth beam of light.
3. Voltage: DC 12V vs. 24V
You will need a matching DC power supply (transformer) to run these strips. They cannot plug directly into a wall outlet.
- DC 12V: Best for shorter runs (usually under 5 meters). It has shorter cutting increments, making it easier to fit precise, smaller spaces.
- DC 24V: Best for longer runs. Higher voltage suffers less from voltage drop (where the light dims at the end of a long strip), allowing you to connect longer continuous lengths safely.
4. Color Options
- Warm White (~3000K): Cozy, relaxing light perfect for bedrooms, living rooms, and ambient accent lighting.
- Natural White (~4000K): Clean, crisp light that mimics daylight. Ideal for kitchens, offices, vanities, and task lighting.
- Red, Blue, Green: Solid, vibrant colors typically used for gaming setups, commercial signage, or holiday decor. (Note: This listing implies single-color options, meaning you choose one color per strip, rather than a color-changing RGB strip).
Quick Installation Checklist
Before purchasing this strip, make sure you also get:
- A Power Supply (Driver): Calculate the wattage you need based on the length of the strip you are installing (typically total meters × watts per meter, plus a 20% safety buffer). Matches the voltage (12V or 24V) to the strip.
- Connectors or Soldering Iron: If you plan to cut the strip and jump across corners.
- A Dimmer (Optional): If you want to adjust the brightness of the white light options.
Are you planning a specific lighting project with this strip, or do you need help figuring out what power supply and accessories you’ll need to go with it?
Price Now: PKR 346.35 (Original price: PKR 502.37, 31% off)
Related Posts
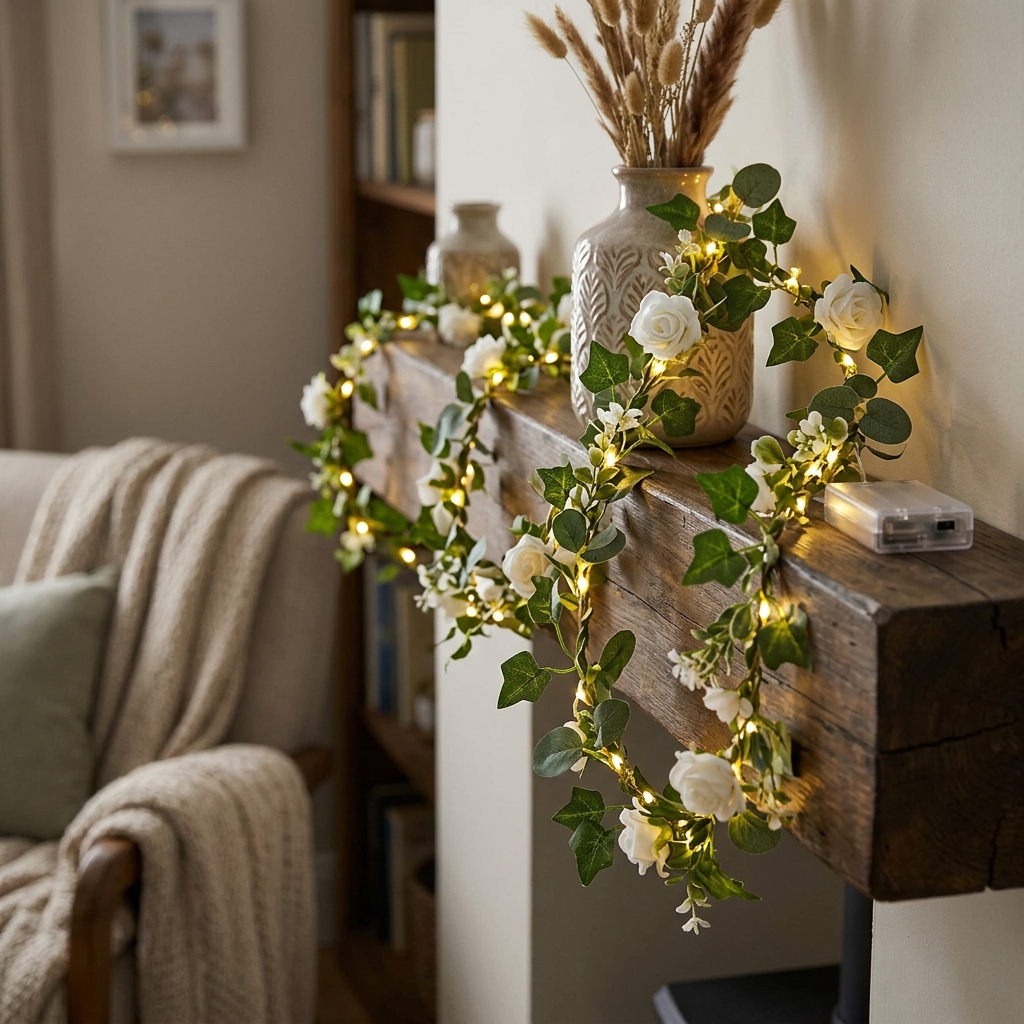
Flower Green Leaf String Lights Artificial Vine Fairy Lights Battery Powered Christmas Tree Garland Light for Weeding Home Decor
This describes a highly popular, budget-friendly decor trend: artificial ivy or floral…

Flashlight Green Blue Red Laser Pointer Indication Light for Meeting Classroom Torch Light RGB
This listing describes a multi-functional 3-in-1 RGB Laser Pointer and Flashlight combo…
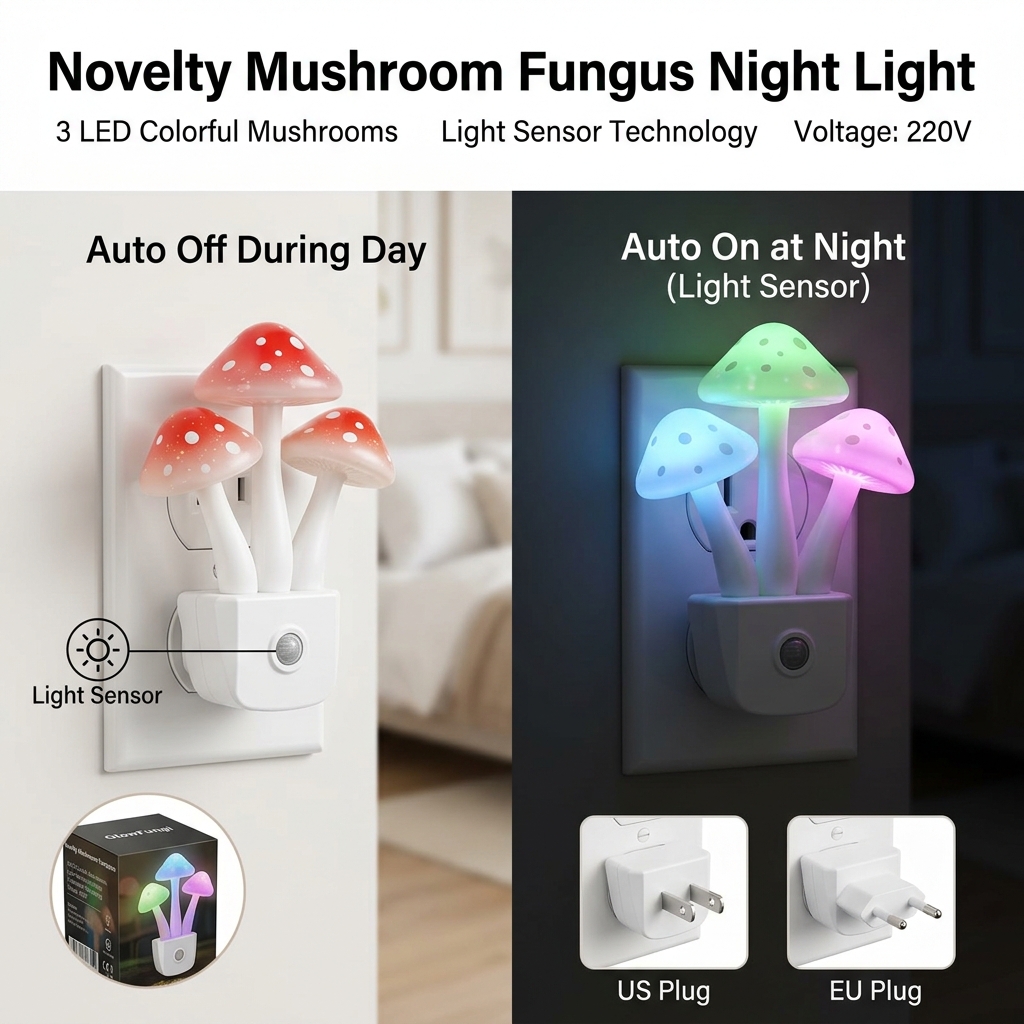
Novelty Mushroom Fungus Night Light EU & US Plug Light Sensor 220V 3 LED Colorful Mushroom Lamp Led Night Lights
This listing describes the highly popular "Avatar-style" Mushroom LED Night Light. Inspired…