
This is a standard product listing title for an AC 220V Driverless LED COB/SMD Chip. These chips are commonly used for DIY lighting repairs, upgrading old incandescent fixtures, or building custom spotlights and bulbs.
Here is a breakdown of what these technical specifications mean and what you need to know if you are planning to use them.
Technical Specifications Decoded
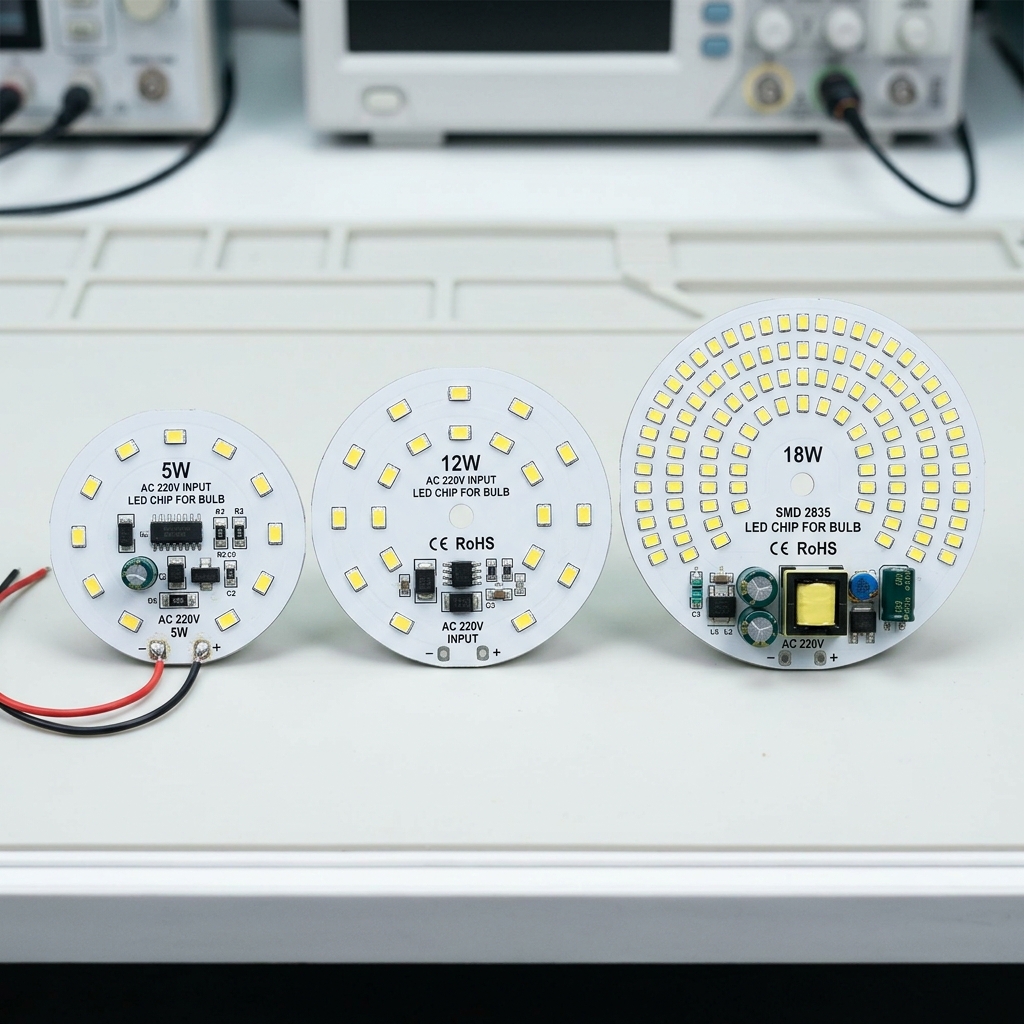
1. AC 220V (Driverless / Smart IC)
Unlike standard low-voltage LED strips (which require a separate 12V or 24V power adapter), these chips operate on Direct AC 220V mains power.
- They feature an integrated circuit (often called a “Smart IC”) directly on the board that regulates the voltage and current.
- The Benefit: You don’t need a bulky external LED driver. You connect your house’s live and neutral wires directly to the designated solder pads on the chip.
2. SMD 2835 Light Beads
This refers to the physical size and type of the individual LED diodes mounted on the round aluminum plate.
- “SMD” stands for Surface Mounted Device.
- “2835” means each individual LED chip measures exactly 2.8 mm × 3.5 mm.
- 2835 chips are highly efficient, offer excellent heat dissipation, and provide high brightness relative to their power consumption.
3. Wattage Options (5W to 18W)
The listing offers a range of power options. Higher wattage means more light (lumens) but also requires better heat management:
- 5W – 9W: Great for small desk lamps, hallways, or subtle accent spotlights.
- 12W – 18W: Ideal for main room lighting, downlights, or replacing bulbs in high-traffic areas like kitchens and living rooms.
Critical Safety & Installation Guide
Because these chips run on high-voltage AC power and generate significant heat, you must follow these installation rules to prevent electric shock or burning out the chip.
⚠️ Thermal Management (Heatsink Required)
Do not power these chips on for more than a few seconds without mounting them to a proper metal surface.
- Because the LED chips and the voltage regulator are packed closely together, they get incredibly hot very quickly.
- Solution: You must mount the aluminum backing of the chip onto a metal heatsink (like the aluminum shell of an old bulb or a dedicated aluminum plate) using thermal paste or thermal tape to draw the heat away. Without this, the chip will overheat and burn out within minutes.
⚡ Electrical Safety
- Turn off the main breaker before wiring.
- Locate the two solder pads on the chip, usually labeled L (Live) and N (Neutral). Solder your 220V power lines directly to these pads.
- Because the board carries exposed 220V current, ensure the entire module is completely enclosed inside a bulb housing or fixture so no one can accidentally touch it while it is plugged in.
What kind of fixture are you trying to repair or build with these chips? If you need help choosing the right wattage or figure out the wiring, feel free to ask!
Price Now: PKR 402.52 (Original price: PKR 558.54, 28% off)
Related Posts

Flashlight Green Blue Red Laser Pointer Indication Light for Meeting Classroom Torch Light RGB
This listing describes a multi-functional 3-in-1 RGB Laser Pointer and Flashlight combo…
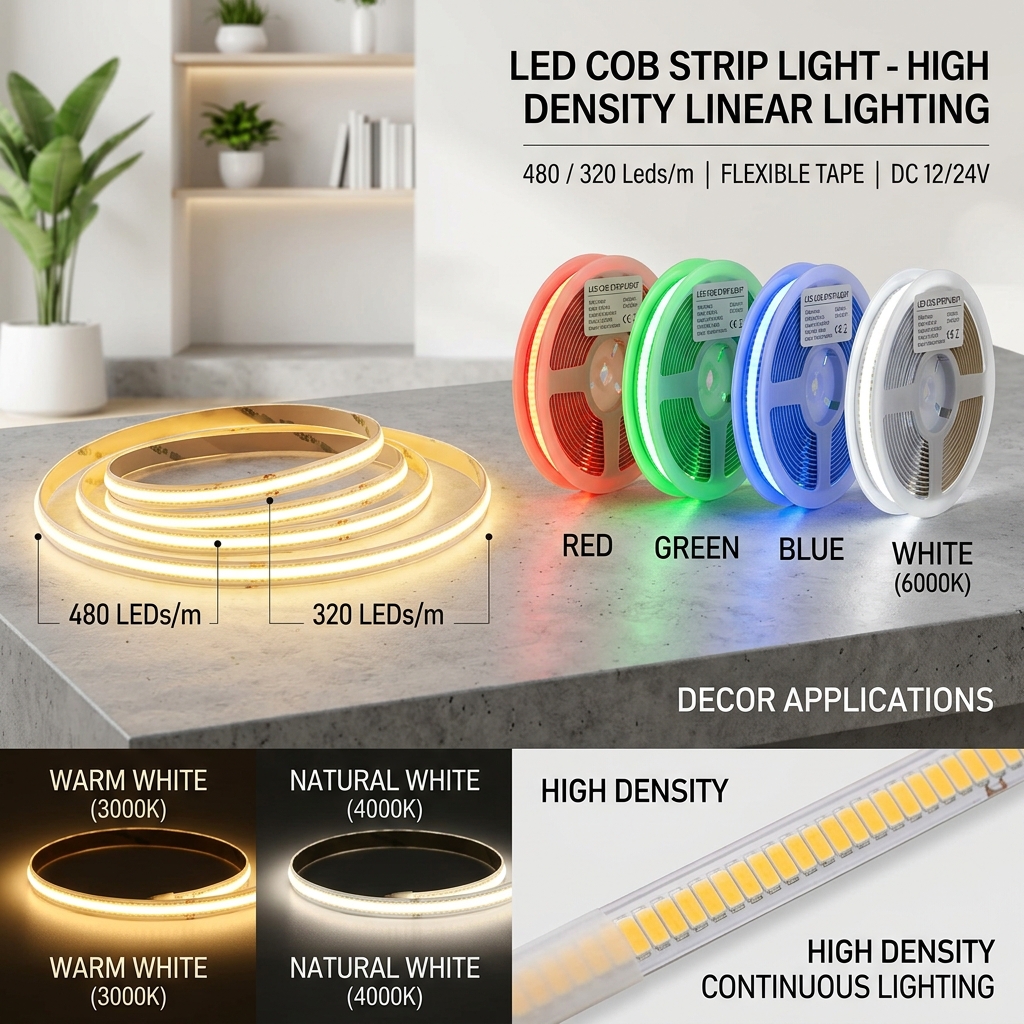
LED COB Strip Light High Density Linear Lighting 480/320Leds/m Flexible Tape Warm Natural White Red Blue Green Decor DC12 24V
This looks like a standard product listing title for a COB (Chip-on-Board)…
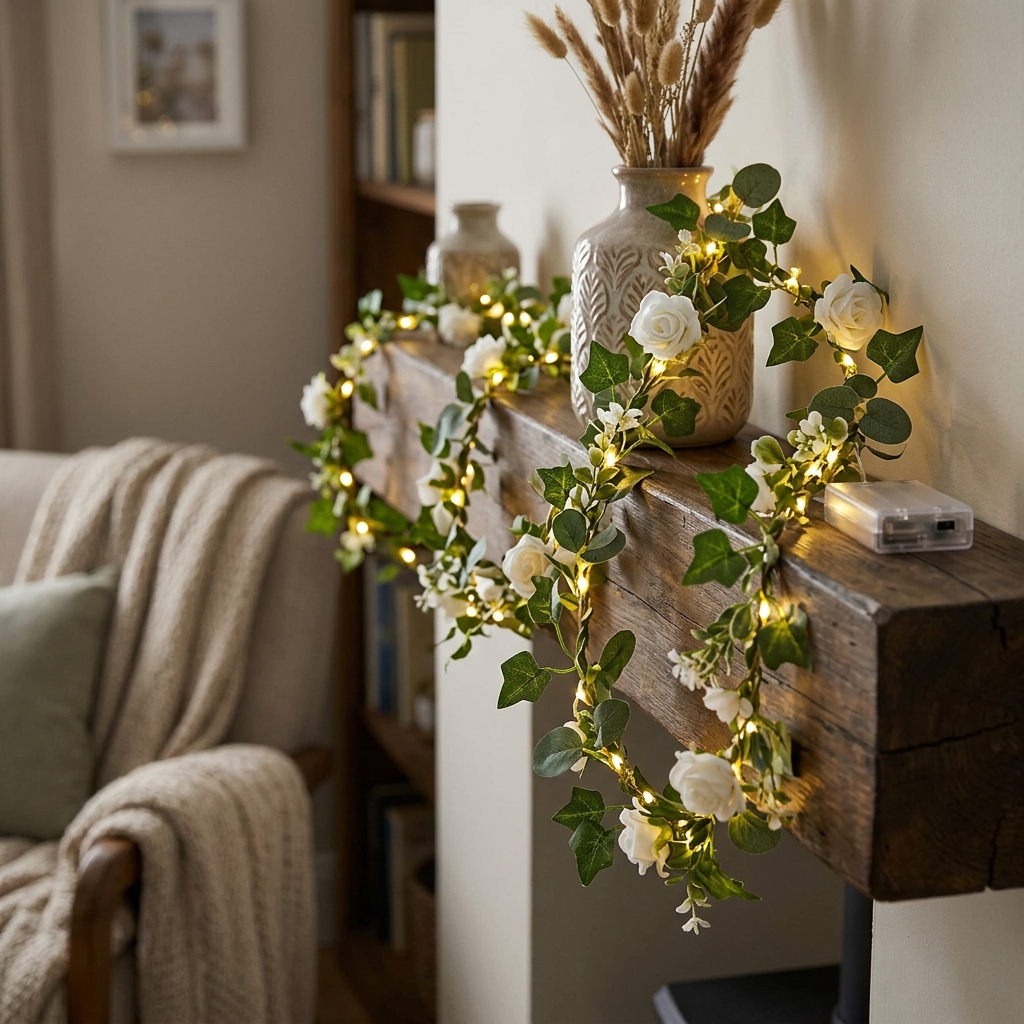
Flower Green Leaf String Lights Artificial Vine Fairy Lights Battery Powered Christmas Tree Garland Light for Weeding Home Decor
This describes a highly popular, budget-friendly decor trend: artificial ivy or floral…