
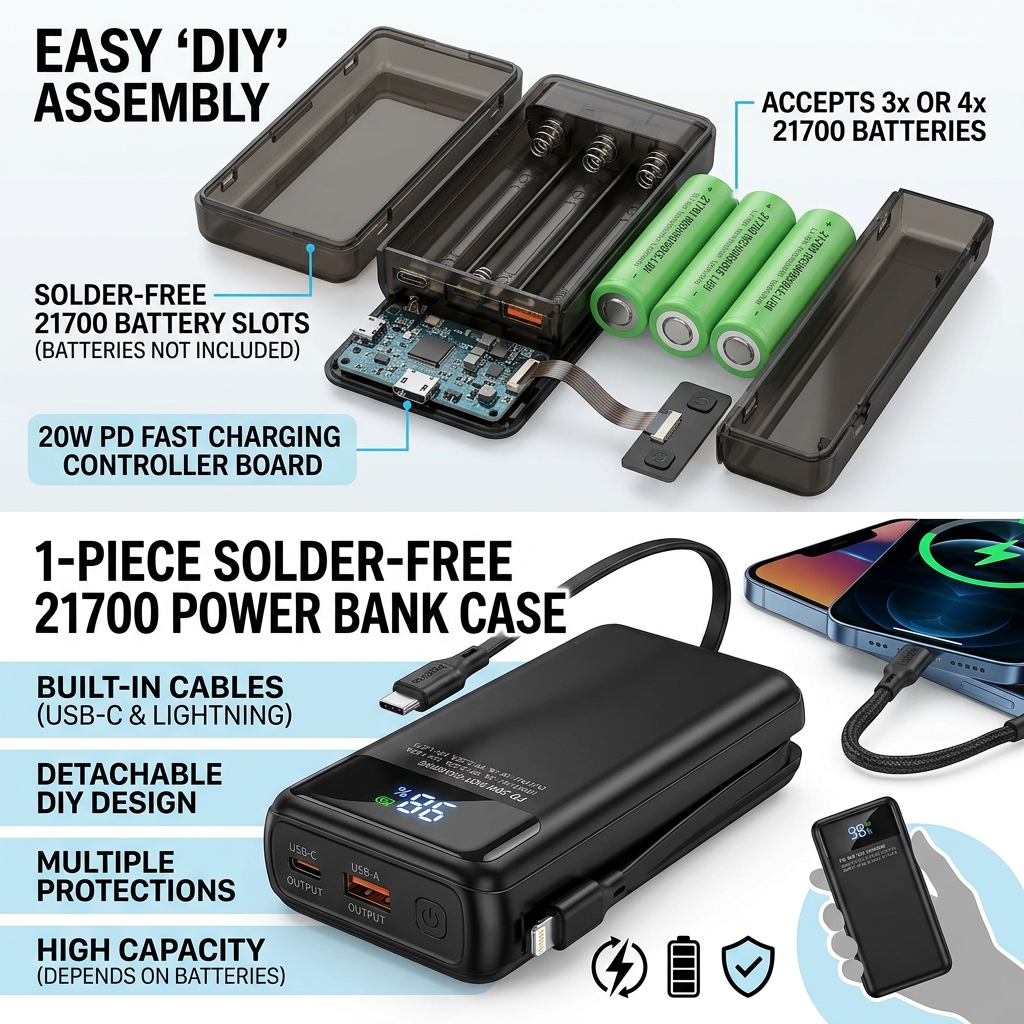
This looks like a product title or listing for a DIY (Do-It-Yourself) Power Bank Case. It is designed for people who want to build their own portable charger using standard lithium-ion batteries without needing specialized tools.
Here is a breakdown of what these specifications actually mean and what you need to know if you are considering buying or assembling one:
Key Features Broken Down
- 1-Piece / Detachable: The case usually snaps together or uses small screws, allowing you to open and close it easily to install or replace batteries.
- Solder-Free: This is the biggest selling point. Traditional DIY power banks require spot-welding or soldering wires directly to the batteries. This case uses built-in spring clips (similar to a TV remote control), so you just pop the batteries in.
- 21700 Battery Compatibility: It is specifically designed to fit 21700 lithium-ion cells. These are larger and hold more capacity than standard 18650 cells (the type used in older power banks and Teslas).
- PD 20W Fast Charging: It supports Power Delivery (PD) up to 20W. This is fast enough to quickly charge modern iPhones, Samsung Galaxies, and other smartphones at or near their maximum standard fast-charging speeds.
- Built-in Cable: The case includes integrated cables (usually USB-C and/or Lightning) that tuck away into the body, so you don’t have to carry extra cords around.
⚠️ Crucial Safety Warnings for Assembly
If you buy this kit, please remember that batteries are usually NOT included. You have to buy the 21700 cells separately. When assembling it, you must follow these rules to avoid destroying the board or causing a fire:
1. Check the Battery Polarity (Positive vs. Negative)
Power bank cases connect batteries in parallel to increase capacity. This means all positive (+) ends must face the same way, and all negative (-) ends must face the same way. Putting even one battery in backward will cause a massive short circuit, melt the plastic, and potentially cause a fire.
2. Match the Battery Voltages
Before putting batteries into the case together, ensure they are at the exact same charge level (ideally, test them with a multimeter to ensure their voltages are within 0.1V of each other). If you mix a fully drained battery with a fully charged battery, the charged battery will rush to fill the empty one instantly, creating dangerous heat.
3. Use Flat-Top, Unprotected Cells
Most DIY cases are precisely molded for flat-top 21700 cells. “Button-top” cells or cells with built-in protection circuits might be too long to fit into the spring brackets.
Pros and Cons of a DIY Power Bank
| Pros | Cons |
| Repairable: If a battery dies, you can swap it out instead of throwing the whole unit away. | Bulkier: 21700 cells are thick, making the final power bank quite chunky. |
| True Capacity: You know exactly what brand and capacity of battery is inside (no fake manufacturer claims). | No Safety Certifications: Unlike Anker or Ugreen, the final safety relies on your assembly and battery quality. |
| Cost-Effective: If you already have spare 21700 cells, it’s incredibly cheap to build. | Spring Resistance: Spring clips have higher electrical resistance than solder, meaning they can run slightly warmer under max load. |
Price Now: PKR 2038.46 (Original price: PKR 2194.48, 7% off)
Related Posts
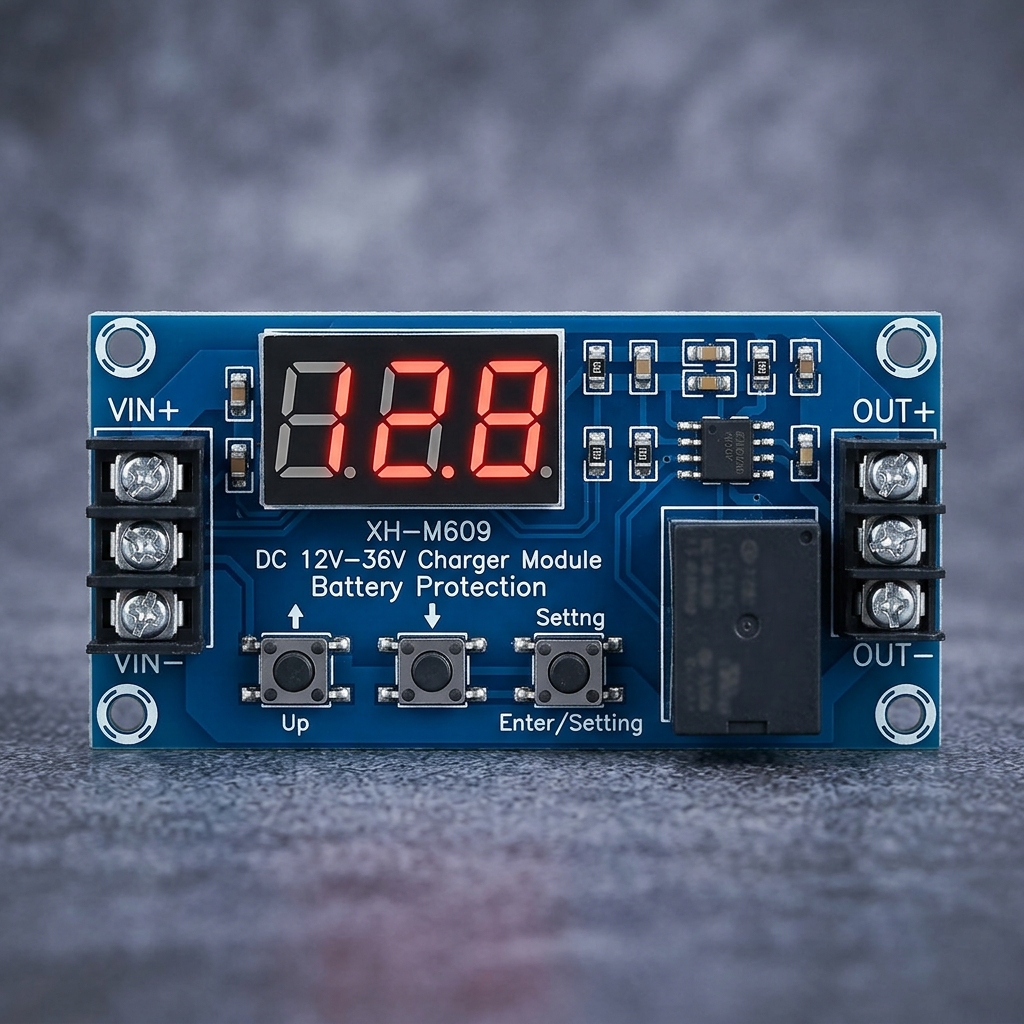
XH-M609 DC 12V-36V Charger Module Voltage OverDischarge Battery Protection Precise Undervoltage Protection Module Board
Protect your battery systems with the XH-M609 DC Voltage Protection Module, designed…
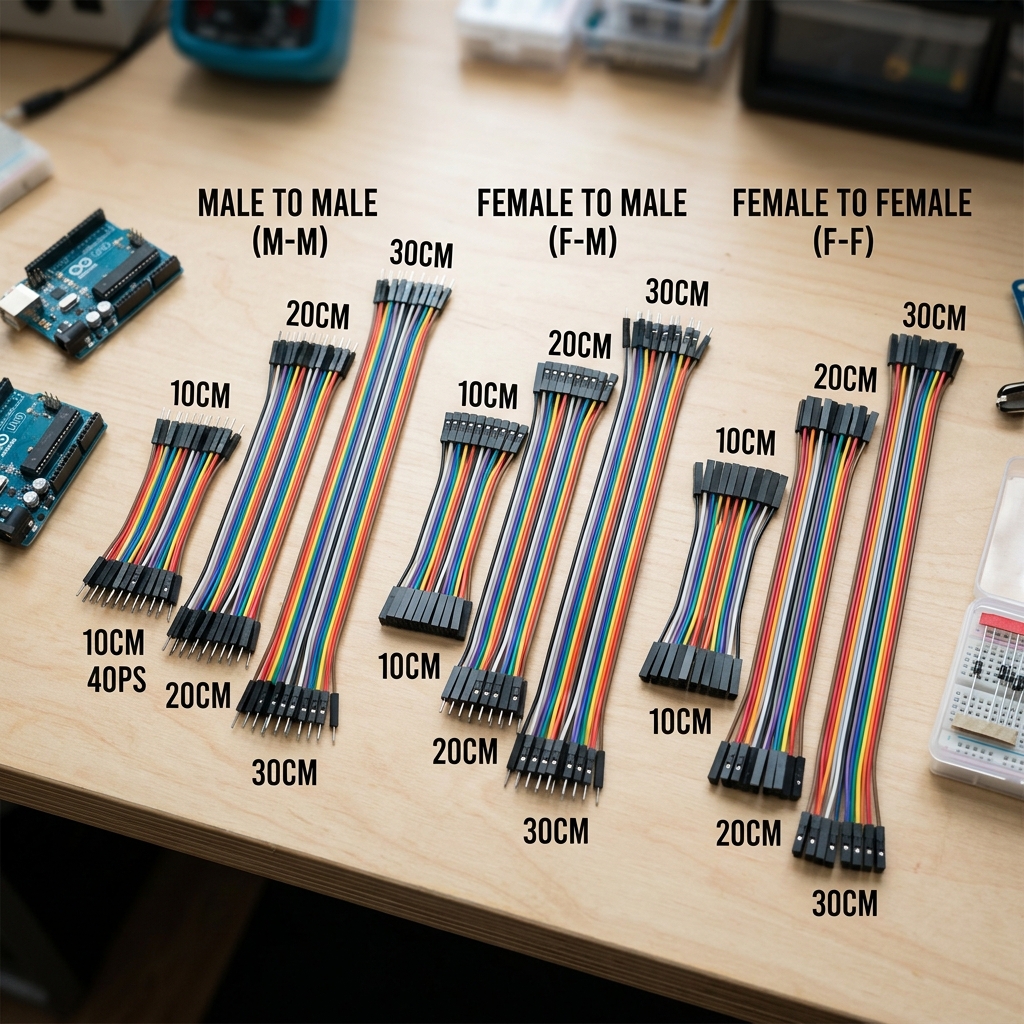
Dupont Line 10cm/20CM/30CM Male to Male+Female to Male + Female to Female Jumper Wire Dupont Cable for DIY KIT
Build and prototype your electronic projects easily with this Dupont Jumper Wire…
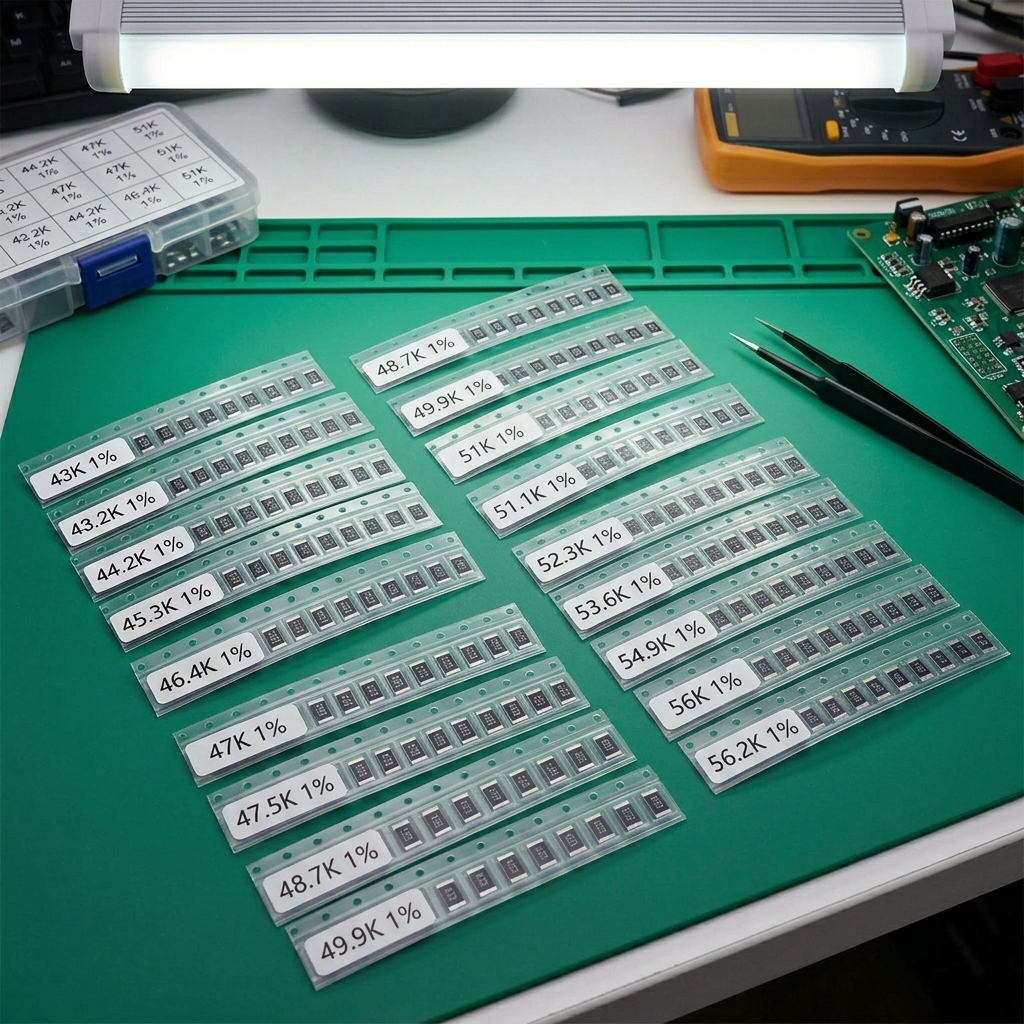
100pcs SMD resistor 0805 1% 1/8W 43K 43.2K 44.2K 45.3K 46.4K 47K 47.5K 48.7K 49.9K 51K 51.1K 52.3K 53.6K 54.9K 56K 56.2K ohm
Upgrade your electronics projects with this 100PCS SMD Resistor 0805 Precision Kit,…